Sliick Photos: Complete User Guide
Version: Updated for Sliick Photos v2.2.0.
Sliick Photos brings a beautiful, modern image and file management experience directly to your Salesforce org. This guide provides comprehensive instructions for both administrators and end-users on how to get the most out of the application.
Guide Overview
To help you find the right information, this guide is split into two sections:
- Part I: Administrator Guide - Installation, permissions, and external storage configuration (S3, GCP, Azure, SharePoint).
- Part II: End-User Guide - How to use the gallery, file list, photo editor, and versioning features.
Part I: Administrator Guide
This section is for Salesforce administrators responsible for installing and configuring Sliick Photos.
1. Installation & Permissions
First, install the package into your Salesforce environment using the AppExchange listing.
Permission Sets
The package includes three core permission sets:
- Sliick Files User: Assign to any user who needs to view/upload photos and files.
- Sliick Files Admin: Assign to administrators who need to manage storage settings and view logs.
- Sliick Pipeline Integration: Required for the integration user if you use the image processing pipeline with external storage.
External Client App Configuration
If you plan to use the Image Processing Pipeline (for automated HEIC-to-JPG conversion and resizing), you must configure the packaged External Client App:
- Go to Setup > App Manager (or External Client App Manager).
- Find Sliick Pipeline Integration and select Edit Policies.
- Under OAuth Policies, ensure Client Credentials Flow is enabled.
- Set Run As User to a dedicated user (we recommend a specific Integration User record).
- Ensure this Run As User has the Sliick Pipeline Integration permission set assigned.
2. Storage Setup
Sliick Photos supports Salesforce Files (default), Sliick Cloud Storage (managed), and Bring Your Own Storage (BYOB).
A. Sliick Cloud Storage (Fully Managed)
The simplest cloud option - This is a paid premium tier that includes managed infrastructure and advanced features like external share links. See the Sliick Photos product page for full pricing details.
- Authorize Your Org: Your Salesforce Org ID must be pre-registered for Sliick Cloud. Contact the Sliick team to have your org authorized.
- Open the Sliick Admin app from the App Launcher.
- Navigate to the Storage Settings tab.
- Select Sliick Cloud Storage and click Connect.
- Connectivity is verified automatically via a zero-touch OAuth flow.
B. Amazon S3
- Bucket: Create a private S3 bucket.
- CORS: In the S3 bucket permissions, add the following CORS configuration:
[ { "AllowedHeaders": ["*"], "AllowedMethods": ["GET", "PUT", "HEAD"], "AllowedOrigins": [ "https://*.lightning.force.com", "https://*.my.salesforce.com", "https://*.force.com" ], "ExposeHeaders": [], "MaxAgeSeconds": 3600 } ] - IAM: Create a user with
s3:PutObject,s3:GetObject, ands3:DeleteObjectpermissions for the bucket. - Salesforce: In Storage Settings, select Amazon S3 and enter your Access Key, Secret, and Bucket Name.
C. Cloudflare R2
- API Token: Create an R2 API token with Object Read & Write permissions.
- CORS: In the R2 bucket settings, add the same CORS JSON as used for Amazon S3 above.
- Endpoint: Use your Cloudflare Account ID to construct the endpoint (e.g.,
https://<account_id>.r2.cloudflarestorage.com). - Salesforce: Select Amazon S3 (R2 uses the S3-compatible provider) and provide the endpoint and credentials.
D. Google Cloud Storage
- HMAC Key: Create a service account HMAC key in the GCS Interoperability settings.
- Permissions: Ensure the service account has Storage Object Admin access to the bucket.
- CORS: Save the following as
cors.jsonand apply it via thegcloud storage buckets update gs://YOUR_BUCKET_NAME --cors-file=cors.jsoncommand:[ { "origin": [ "https://*.lightning.force.com", "https://*.my.salesforce.com" ], "method": ["GET", "PUT"], "responseHeader": ["Content-Type"], "maxAgeSeconds": 3600 } ] - Salesforce: Select Google Cloud Storage and enter the HMAC Access Key and Secret.
E. Azure Blob Storage
- Storage Account: Create a Standard storage account and a private container.
- CORS: In the Azure Portal, under Resource sharing (CORS) for the Blob service, add these values:
- Allowed origins:
https://*.lightning.force.com, https://*.my.salesforce.com - Allowed methods:
GET, PUT - Allowed headers:
* - Max age:
3600
- Allowed origins:
- Salesforce: Select Azure Blob Storage and enter your Account Name, Account Key, and Container Name.
F. SharePoint
- Azure AD: Register a new application in Microsoft Entra ID.
- Permissions: Add
Sites.Selectedapplication permissions and have a SharePoint Admin grant access to your specific site. - IDs: Retrieve your Site ID and Drive ID (Document Library ID) via the Graph Explorer.
- Salesforce: Select SharePoint and enter the Client ID, Secret, Tenant ID, Site ID, and Drive ID.
3. Image Processing Pipeline
The pipeline provides automatic HEIC-to-JPG conversion, orientation correction, and resizing.
- In Storage Settings, toggle Enable Pipeline (not supported for SharePoint).
- Ensure the Sliick Pipeline Integration External Client App has a Run As User configured in App Manager.
- Click Verify to confirm connectivity.
- Configure Max Width/Height (default 2048px) and JPG Quality (default 80%).
4. Component Configuration
Drag the components onto any Record Page in the Lightning App Builder:
- Sliick Profile Photo: Ideal for the sidebar or header. Toggle Circular Crop as needed.
- Note: This component automatically detects and displays the photo of an associated Experience Cloud User. If the record is not linked to a portal user, the upload and management controls appear for manual use.
- Sliick Photo Gallery: Configure Default Display Mode (Carousel or Grid) and Storage Location (Salesforce or External).
- Sliick File List: The primary hub for managing files in external storage. Set Storage Location to match your active provider.
- Best Practice: For native Salesforce storage, use the standard Salesforce Files related list for the best experience. The Sliick File List is specifically designed to bring desktop-class file management (like version restoration and bulk queueing) to external cloud storage.
Part II: End-User Guide
This section is for anyone who uses Sliick Photos day-to-day to manage record images and documents.
1. Profile Photos
The Profile Photo component provides a quick way to manage a record’s avatar (e.g., for a Contact or Person Account).
- Automated Detection: If a record is linked to an Experience Cloud User, the component automatically displays their portal profile photo. In this case, the photo is managed via the user’s portal profile settings, and manual upload controls are hidden.
- Normal Records: For standard Contacts and Accounts, users can manually manage the photo:
- Viewing: The component automatically displays the latest uploaded photo or a default placeholder.
- Uploading: Click the Upload icon or the image itself to select a
.jpgor.pngfile (max 4 MB). - Deleting: Click the Delete (trash) icon to remove the current photo.
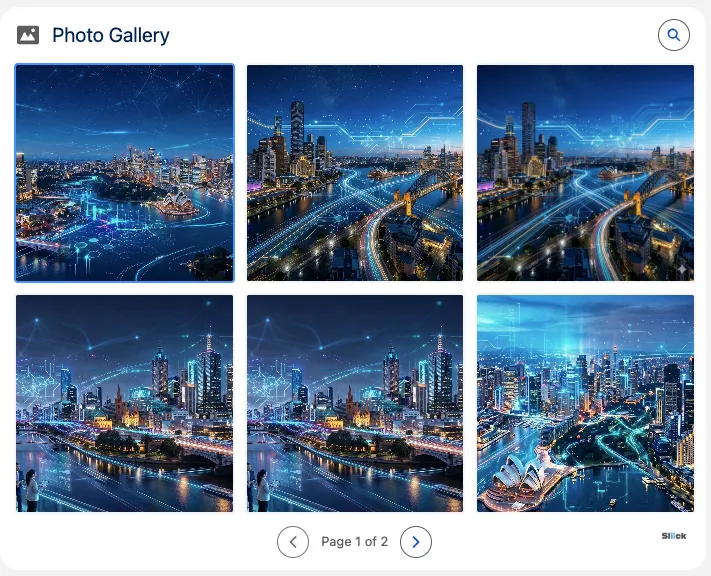
2. Image Gallery & Photo Editor
The Image Gallery allows you to browse and modify images attached to a record.
- Browsing: Use Carousel mode (slide left/right) or Grid mode (view thumbnails).
- Search & Tags: Use the search bar to filter images by name or by comma-separated tags (e.g., “damaged, front, Q4”).
- Editing: Click any image to open the Photo Editor.
- Pen: Draw freehand with custom colours and thickness.
- Text: Place text annotations directly on the image.
- Eraser: Remove specific annotations.
- Undo/Redo: Step backwards or forwards through your edits.
- Saving: Click Save to create a new version of the image (the original is preserved).
3. Comprehensive File List
The File List component manages all file types in your external storage location, including PDFs, documents, and spreadsheets.
Use the right tool for the job: If your organisation stores files directly in Salesforce (ContentVersion), use the standard Files related list. The Sliick File List is optimised for external cloud storage and providing advanced versioning and bulk management features for those platforms.
Bulk Uploads & Drag-and-Drop
- Select Multiple: Click the upload input and select up to 50 files at once.
- Drag & Drop: Simply drop files from your computer onto the component.
- Queue Worker: A progress panel appears showing the status of each upload (Queued, Uploading, Complete, or Failed). You can Retry failed uploads individually or Cancel the entire batch.
Version History management
Sliick Photos maintains a full history of your files.
- Expandable View: Click the arrow next to a file name to see its previous versions.
- Download: Retrieve any historical version to your computer.
- Restore: Make a previous version the “Current” active file.
- Rename/Delete: Update display names or permanently remove files and all their versions.
4. External Sharing (Sliick Cloud Only)
If your organisation uses Sliick Cloud Storage, you can generate secure, shareable links for external collaborators.
- Find the Share icon in the Image Gallery or File List.
- Set an Expiry Date for the link.
- Copy the URL to your clipboard.
- External users can view the files via a branded portal without needing a Salesforce login.
5. FAQ & Troubleshooting
- “File is too large”: Salesforce storage is limited to 4 MB per file. External storage allows for much larger files.
- “Processing…” Spinner: Heavily compressed or HEIC files may take 2-5 seconds to be processed by the pipeline. Refreshing the page usually resolves this.
- “Failed” Badge: If an upload or processing task fails, click the Retry button next to the file.
- Missing Tags: Tags are currently supported only for files stored in external cloud storage.
Summary
Sliick Photos transforms how your team manages images in Salesforce. From a simple profile photo to multi-cloud storage with automated processing pipelines, the application scales with your needs while keeping your images organised and accessible.
Ready to get started? Install Sliick Photos from the AppExchange today!
We'll audit your architecture, security, and integration posture.